How to set up a subscriber list for newsletters using Mail Chimp

In this tutorial I’m going to show you how you can use Mail Chimp to mange your potential clients or fans for newsletters and marketing. I chose Mail Chimp because it has a free limited service with “branding” but you can customize forms to make it invisible. (Click to enlarge screenshots.) Since your subscribers will be a major portion of your traffic and leads, it is essential you establish reliable communication with them.
After you create your account and log in you’ll see the dashboard with three options. (The address you use for your new account will appear in all email correspondence to your subscribers.)
1) Set your account defaults through the menu “Account > My Defaults”
2) Create a new list.

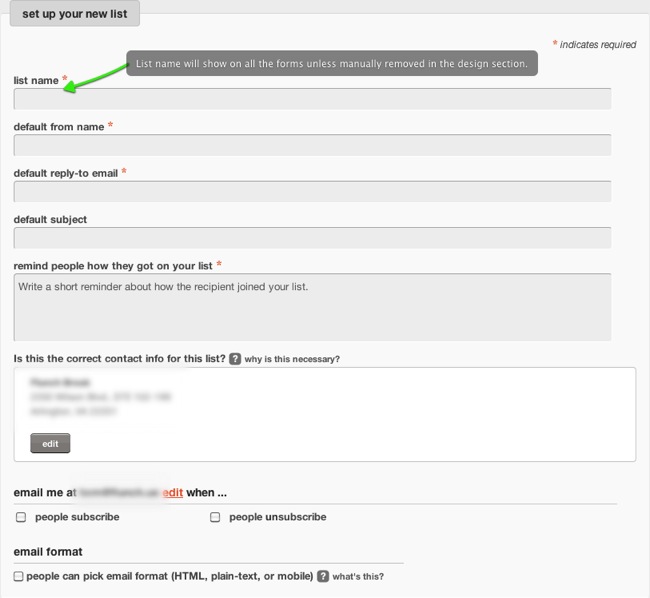
Now fill in the details for your new list. The name you choose on your list will appear on all forms which can be edited manually in the design process. I suggest using a forwarding email name for the reply-to just in case the email name gets sucked into a SPAM volcano and melts your inbox.
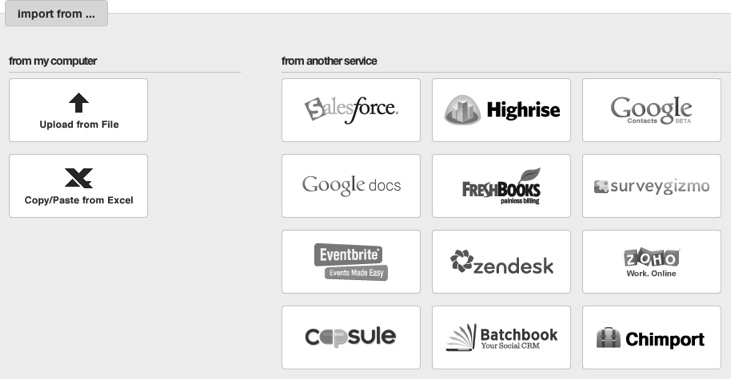
If you already have a fan base with their emails you may import them using the “import” feature. Mail Chimp’s acceptable formats are CSV or tab delimited text files and Copy/Past from Excel spreadsheet. You can also import directly from the service providers shown in the screenshot using an API key.
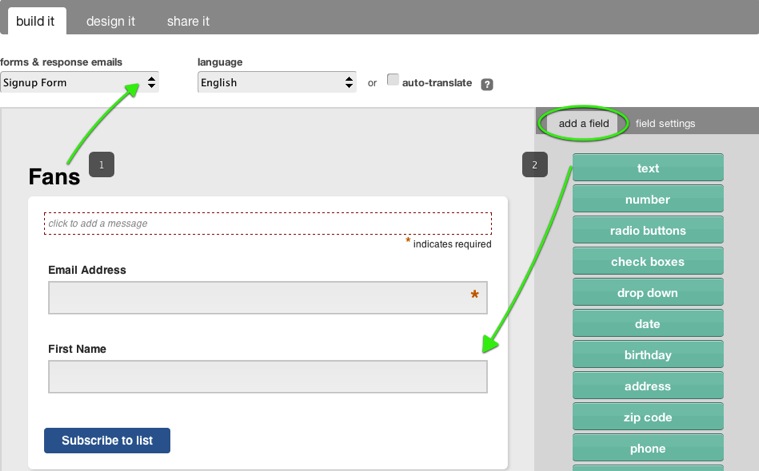
3) Build, configure, and customize the forms. This is where you will set the fields you need for your form and determine which ones are required. For our subscriber list we will use an “email address” and “name” fields.
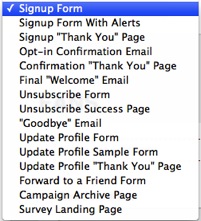
Get the first “Signup Form” configured the way you want it. Go through the “Design it” phase to style it before you edit the other forms. There’s a bunch to choose from but once you get the first one styled the others will inherit that style. Here’s a list of the other forms.
4) Now click on the design tab to style it. This sets the CSS styles for each element or you can use the pre-defined styles from the theme list.
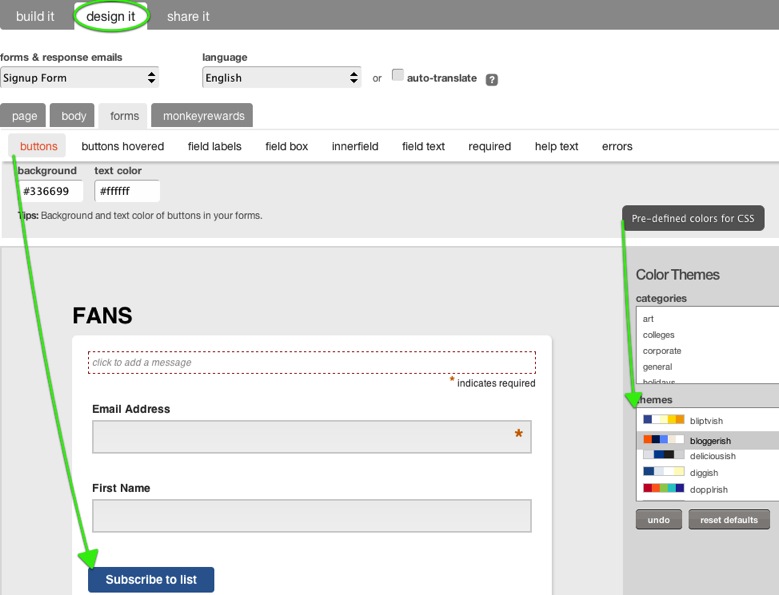
The Monkey rewards section adds the branding to the forms in the FREE account. You branding can be made invisible in the “Share It” tab by stripping out the CSS (next step).
5) Click on the “Share It” tab to get code to be placed in your website along with more options. For the beginner you can direct people to the URL but I do NOT recommend this especially with the free account because you have NO BRANDING. This totally goes against “user interaction” guidelines. It’s cool that Mail Chimp provides a QR code, but only use it in print material. Everyone else should click the “Create HTML…” button for the next step.

This is the last step prior to getting subscribers, so go through it carefully. The Super Slim Form will include CSS code as you set it in the design phase. The only two options here are for the Title and form width.
The Classic Form allows additional options including the automatic lightbox “pop-up” form, toggle required indicators, and disable javascript (this will remove front-end validation). The “Enhance Your Form” section is a social feature exactly as written.
I recommend the Naked Form for experienced web designers only because it automatically removes CSS and Javascript, allowing you to only include the form code and style it yourself. Using this option I’ve set my form to display a confirmation only after a valid email. The Default option loads a new page in a new window which breaks the streamline user experience.
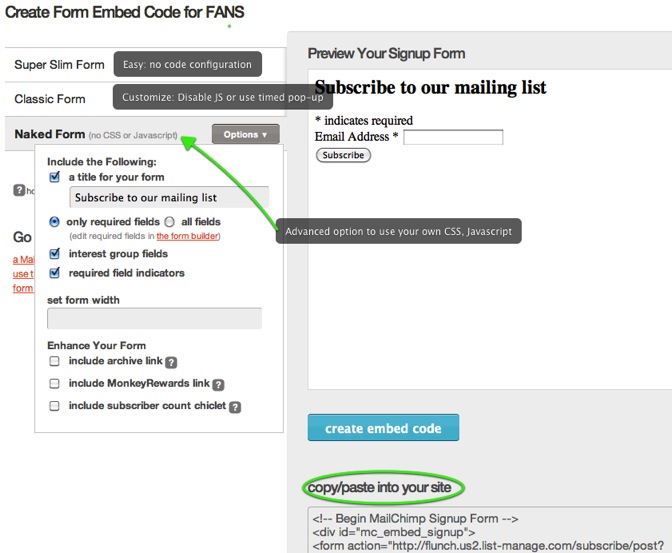
You can edit these options later from Mail Chimp’s LIST page.

LOOK FOR THE NEXT TUTORIAL ON STARTING A CAMPAIGN!
Can I customise the sign up form for our website with the same colours as I used in the form I send by email?
Thanks,
YES YOU CAN. Look at item 4.