I wish someone told me this about React Native Expo – Full Tutorial
Here’s what I learned about React Native as a full-stack engineer. Thinking that it would be an easy ride having previous experience in ReactJS, but….. it’s maddening different. Nonetheless, I’ll teach you how to use it and that you should still choose React Native.
Mobile app development doesn’t have to be an overwhelming maze of complex frameworks and endless tutorials. The secret to mastering this lucrative skill lies in choosing the right learning path that matches your background and goals. Whether you’re a complete beginner or transitioning from web development, the most effective approach combines hands-on project building with structured learning. Start with a single cross-platform framework like React Native, Ionic, Swift or Flutter.
This comprehensive guide focuses on mobile dev coming from web dev based on today’s competitive market. Unlike generic tutorials that teach isolated concepts, we’ll walk you through the components that are the same and different in ReactJS. You’ll discover exactly which technologies to learn first, how to avoid common pitfalls that derail beginners, and why building real projects from day one accelerates your learning exponentially.
This is a tutorial guide on how to build an android mobile app using React Native + Expo for testing and deployment. React Native Expo is an excellent tool which speeds up your development time. Prior to trying Expo, I tested building an android app using other methods such as Ionic Framework, Flutter, Kotlin, and Swift. Kotlin and Swift are too far off-base from my existing skillset so I rejected them. Flutter is newer, cross-platform capable, with a rendering engine on-par to native thus making it more appealing. Since it has a deep learning curve and I don’t plan on being a full-time Flutter developer so I dropped that as well.
OUTLINE
- Mobile App frameworks
- Prerequisite installation
- React Native boilerplate
- Step 1: Stack Screen, SafeAreaView and Text
- Step 2: Webview and Platform
- Step 3: Adding a logo image
- Step 4: Adding Menu Links and ScrollView
- Step 5: Adding Pages and Contact Form
- Step 6: Embedding Custom Fonts & Icon
- Last step is to build and deploy
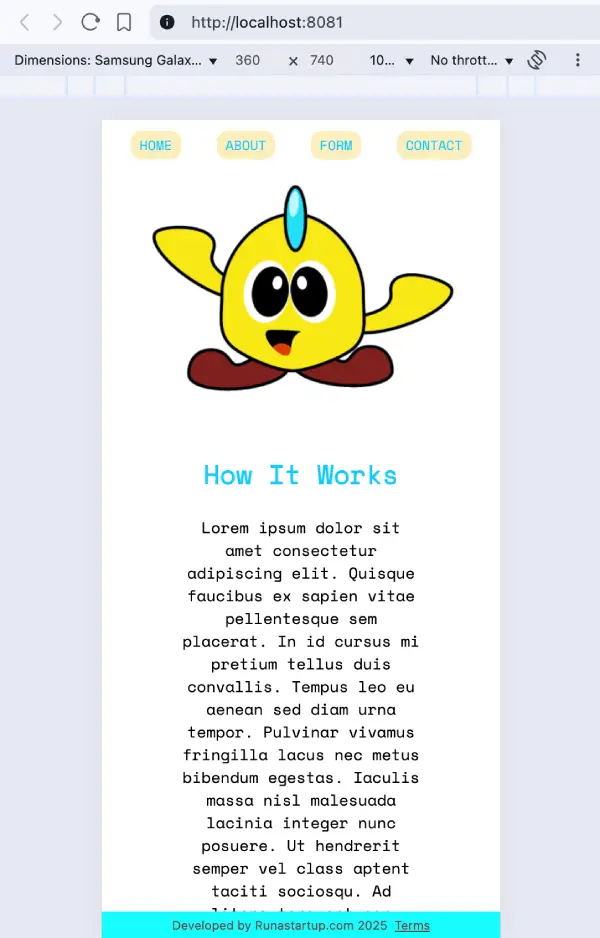
Your result will look like this and the github repo is linked at the end of this article. If you’re running into errors from the code snippets here, ensure it matches the code from the updated repo.
Mobile App Frameworks
Ionic seems easiest for programmers with javascript experience so it was my first choice. Afterwards, I researched into deploying the app to the Google Play Store and that’s when my decision fell apart. Ionic also is rated lower in performance compared to React Native with less support content available. This is when I discovered https://expo.dev/ which streamlines the deployment process including making app testing very easy by downloading the expo app to an android phone. We will reference the building and deployment part later in this article.
Which Should You Choose?
Choose React Native if: You have JavaScript/React experience and want to leverage existing skills for mobile development. It offers the best balance of performance, community support, and job opportunities.
Choose Ionic if: You’re a web developer who wants to quickly transition to mobile using familiar HTML/CSS/JS skills, or you need to target web and mobile simultaneously.
Choose Flutter if: You want cutting-edge performance and don’t mind learning Dart. It’s Google’s bet on the future of cross-platform development and shows tremendous growth potential.
Choose Swift if: You’re focusing exclusively on iOS development, need maximum performance, or want to build apps that deeply integrate with Apple’s ecosystem.
For beginners, React Native offers the most practical starting point due to its large community, extensive job market, and transferable JavaScript skills that remain valuable across web and mobile development.
Since I’m a full-stack engineer with extensive experience using ReactJS so inherently, I thought using React Native would be the best choice for making an android app but I didn’t want to immediately rule out other methods. Although, I did rule out coding in native android using java. That’s out for me since I don’t want to mess too much with Android Studio and you don’t need to with Expo.
If you’re a beginner to mobile app development and you’re coming from a web dev background or as a front-end engineer, this is exactly for you! React Native offers many resources including official documentation and a github community page. Recently, React Native has picked up pace on development including a major architecture change of its engine. It’s possible that some of the API in this article may have been outdated already like in most of the programming world.
Let’s begin with the development of the React Native app with explanations along the way. The type of app we are building is similar to a website which has several pages with a navigation menu, a radio group submission form, a contact form, and a separate back-end to process the form submissions. For the back-end we will use Python with flask and the code will be provided with a summary. The only 3rd party services we will use is free and streamlines the process for packaging the app for deployment; that is Expo.
While it’s possible to “vibe code” a mobile app, you should understand the basics of coding it first so you can make changes, additions, and continue a path in mobile app development.
Prerequisite Installation
There are a few pre-requisites to start which is to setup your environment and we’ll do that for Mac OS using terminal’s command line. Ensure you have the following software installed:
NodeJS https://nodejs.org/en or in terminal: brew install node
-Node Expo Package:
npm install expo@0.22.26 -for existing projects use:
npx install-expo-modules@latest
Expo Go App for testing. Optionally, you can install Android Studio for the simulator
Code editor: https://code.visualstudio.com/
After installation, check your node, npx and npm version number to ensure compatibility. As of this article, we have v24.6.0
node -vnpm -v
npx -v
Navigate to your working directory and start a new project:
npx create-expo-app my-react-native This will setup boilerplate code with the files:
README.md         components        node_modules      tsconfig.json
app               constants         package-lock.json
app.json          eslint.config.js  package.json
assets            hooks             scripts
We won’t be using all the boilerplate code. It’s too much to start with so let’s run the reset command:
npm run reset-project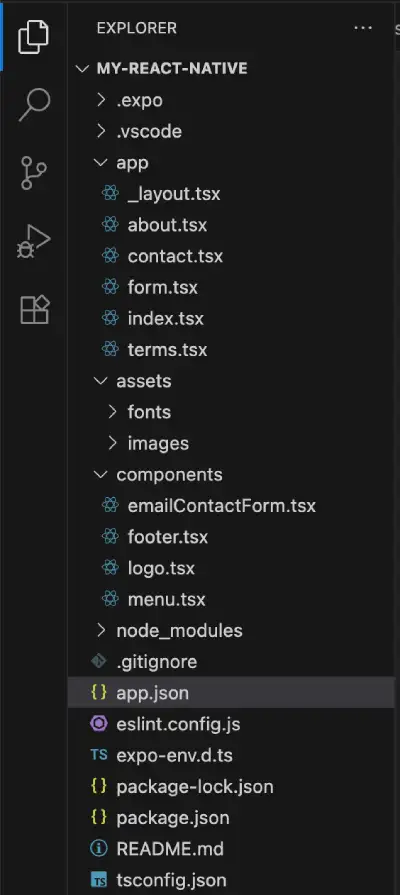
Expo has scripts to run your project so if you inspect package.json you will see:
   "start": "expo start",
    "reset-project": "node ./scripts/reset-project.js",
    "android": "expo start --android",
    "ios": "expo start --ios",
    "web": "expo start --web",
    "lint": "expo lint"
  },
npx expo start
loads your project locally in the browser with options to open it in the Expo App on your android device with the listed keyboard shortcuts. The following commands are displayed to give you the option to load the app in a browser, iOS simulator and Android simulator.
Starting Metro Bundler
[QR CODE SHOWN FOR THE EXPO APP]
› Metro waiting on exp://192.168.8.173:8081
› Scan the QR code above with Expo Go (Android) or the Camera app (iOS)

› Web is waiting on http://localhost:8081

› Using Expo Go
› Press s │ switch to development build

› Press a │ open Android
› Press i │ open iOS simulator
› Press w │ open web

› Press j │ open debugger
› Press r │ reload app
› Press m │ toggle menu
› shift+m │ more tools
› Press o │ open project code in your editor

› Press ? │ show all commands
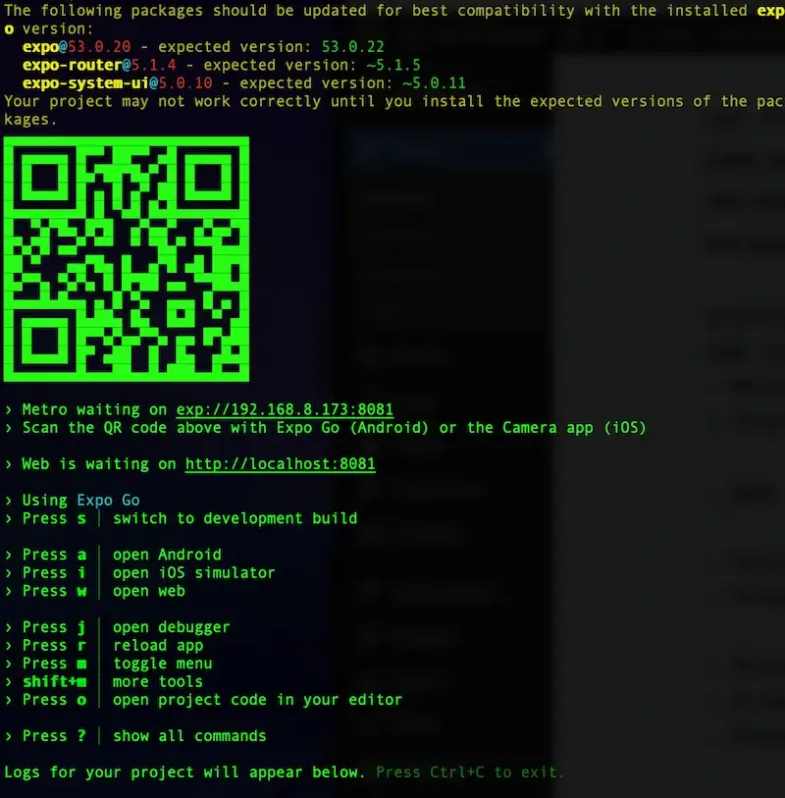
The qr code is the same as the address exp://192.168.8.173:8081 which is designed to load in the Expo Go app. After resetting the boilerplate, your app load a plain gray window with “index” shown at the top. From here we can continue adding our own codes.
You can follow along using my github repo located at http://github.com/rutkat/react-expo-tutorial/ and checkout different branches for each step.
-From here check out branch step01
The first similarity to ReactJS you will notice is the file structure and typescript support as the default:
app
assets
components
constants
hooks
scripts
app.json
package.json
tsconfig.json
We also have file-based routing: two screens: app/(tabs)/index.tsx and app/(tabs)/explore.tsx. The layout file in app/(tabs)/_layout.tsx sets up the tab navigator. However in this tutorial, we will use simpler routing using <Stack.Screen> in the app/_layout.tsx file. That’s the default. The name parameter should correspond to the file name and the options include a tilte and headerShown which we will hide.
#_layout.tsx
import { Stack } from "expo-router";

export default function RootLayout() {
  return (
    <Stack>
      <Stack.Screen name="index" options={{ title: 'Home', headerShown: false }} />
    </Stack>
  );
}
Here we renamed the title and hid the header. Let’s also modify the index contents by adding a container and stylesheet. You’ll immediately notice CSS styles which are not entirely identical to web CSS. We’re also including the component <SafeAreaView>. It will ensure our top menu and footer will render without being cropped.
In order to use any components, they have to be imported at the top of the file and many of them have to be installed as a package through npm so in index.tsx import: SafeAreaView, StyleSheet.
import { SafeAreaView, StyleSheet, Text, View } from "react-native";

export default function Index() {
  return (
    <SafeAreaView style={styles.container}>
      <View style={styles.bodyContainer}>
        <Text>...</Text>
      </View>
    </SafeAreaView>
  );
}

const styles = StyleSheet.create({
  container: {
  },
  bodyContainer: {
  },
});
We moved the inline styles from <View> into a const variable. This is how to style components. React Native uses modified CSS which non-integer property values need to be in quotes and property names in camelCase. Also they are more specific for certain styles such as marginHorizontal.
What is <View> and <Text>? What are these funky React tags??
Well, they are not ReactJS, not HTML and due to the unique rendering engine, HTML is not supported! OH THE HORROR! You thought you were going to code just like ReactJS… Sorry but no and I felt the same way so I understand if you want to “nope” outta here. <Text> is just for strings; the equivalent to NSAttributedString on iOS and SpannableString on Android. <View> is a layout like a <div> which supports flexbox styling but NOT scrolling. Unbelievable!
For scrolling, you need a different component called <SrollView> because after all this is not for a web browser engine and scrolling ability is not a default android behavior. Let’s add a list because that should be easy-peazy right? Another shocking moment!
There is no default list support or a list tag. You have to wrap <Text> in <ScrollView> and use character codes for the bullet icons wrapped in curly braces. Update the index.tsx file with:
import { SafeAreaView, StyleSheet, Text, View } from "react-native";

export default function Index() {
  return (
    <SafeAreaView style={styles.container}>
      <View style={styles.bodyContainer}>
        <Text style={styles.bodyContainer}>
          <Text style={styles.bodyTitle}>
            How It Works
          </Text>
          <Text>
            {'\n\n'}Lorem ipsum dolor sit amet consectetur adipiscing elit. Quisque faucibus ex sapien vitae pellentesque sem placerat. In id cursus mi pretium tellus duis convallis. Tempus leo eu aenean sed diam urna tempor. Pulvinar vivamus fringilla lacus nec metus bibendum egestas. Iaculis massa nisl malesuada lacinia integer nunc posuere. Ut hendrerit semper vel class aptent taciti sociosqu. Ad litora torquent per conubia nostra inceptos himenaeos.
            {'\n\n'}Pulvinar vivamus fringilla lacus nec metus bibendum egestas. Iaculis massa nisl malesuada lacinia integer nunc posuere. Ut hendrerit semper vel class aptent taciti sociosqu. Ad litora torquent per conubia nostra inceptos himenaeos.
            {'\n'}
          </Text>
          <Text>{'\n\u2022'} Bullet-style List Item 1</Text>
          <Text>{'\n\u2022'} Bullet-style List Item 2</Text>
          <Text>{'\n\u2022'} Bullet-style List Item 3</Text>
        </Text>
      </View>
    </SafeAreaView>
  );
}

const styles = StyleSheet.create({
  container: {
    flex: 1,
    flexDirection: "column",
    alignItems: "center",
    color: '#00cbff;',
    backgroundColor: '#FFF',
    marginBottom: 20,
  },
  bodyContainer: {
    marginHorizontal: 18,
    padding: 18,
    fontSize: 14,
    textAlign: 'center',
  },
});
Big change and big goals! We’re done with step01, preview it by running npx expo start. Let’s proceed to the next step with git checkout step02
Let’s a add a new page which allows loading content from a live website. This is what corporations commonly do for terms & conditions which are long bodies of text without styling. Since it’s actual legalese, accuracies is very important so the content needs one source of truth instead of duplicating in separate codebases. Update the _layout.tsx file and create a new file terms.tsx.
We introduce <Platform> and <Webview> components which will allow conditional rendering between an iframe and android’s webview. Without this, <Webview> will not render in your web browser and iframes won’t render on Android. <Platform> detects the operating system.
//_layout.tsx
<Stack>
  <Stack.Screen name="index" options={{ title: 'Home', headerShown: false }} />
  <Stack.Screen name="terms" options={{ title: 'Policy & Terms', headerShown: true }} />
</Stack>
This time we show the header for the terms page. We don’t have a menu yet, but you can access the terms.tsx page directly by url http://localhost:8081/terms
import { StyleSheet, Platform } from 'react-native';
import { WebView } from 'react-native-webview';

export default function Terms() {
  const url = "https://www.lipsum.com/"

  return Platform.OS === "web" ? (
    <iframe src={url} height={'100%'} width={'100%'} />
  ) : (
    <WebView
        originWhitelist={['*']}
        style={styles.webview}
        source={{ uri: url }}
    />
  );
}

const styles = StyleSheet.create({
  webview: {
    flex: 1,
    alignItems: 'center',
    width: '100%',
    marginTop: 22,
  },
});
When you’re testing this on your Android simulator or Expo Go app, localhost won’t automatically fetch the live website. That’s why we have the property originWhitelist set to allow all. This feature can be used for other purposes too since it’s an android wrapper of a website but user experience will be less smooth. That’s it for step02.
git checkout step03
Adding a logo image!
Let’s add something cute which will be a cute cartoon logo I drew myself. We will separate it as a component so it can be included by a single tag. Create a components folder and logo.tsx inside of it. Feel free to use any graphic of your choice if you disapprove of my drawn character.
React Native has several image components so we’ll use the standard one <Image> and place it inside a container with styles then import logo.tsx in your index.tsx file. Don’t forget to add the image file under assets/images/. The falsely included React logo was removed since it served no purpose.
// components/logo.tsx
import { View, Image, StyleSheet} from 'react-native';

const srcLogo = require('@/assets/images/myyellow.png');

export default function Logo() {

  return(
    <View style={styles.safeContainer}>
      <Image
        style={styles.logo}
        source={srcLogo}
      />
    </View>
  )
}

const styles = StyleSheet.create({
  safeContainer: {
   alignItems: "center",
  },
  logo: {
    backgroundSize: "contain",
    width: 300,
    height: 220,
  },
});
Open your browser, enable browser dev tools and enable the mobile view screen so it better resembles a phone device. Did you notice the content cropping? The logo pushes the text down and you can’t scroll down! So bizarre for React Native not to enable scrolling by default. We must add it using the <ScrollView> component so let’s included it after <SafeAreaVIew>
// index.tsx
import Logo from '@/components/logo'
<SafeAreaView style={styles.container}>
  <ScrollView>
    <Logo />
    ...
  </ScrollView>
</SafeAreaView>
Great! Now that we can scroll because we have a big graphic and lots of text for a small device screen, let’s add fixed footer which is always visible and discover more irregular CSS styles. We also introduce the <Link> tag which enables navigation within the app. Preview the progress with npx expo start
git checkout step04
Static-positioned Footer
To add a footer we will make a component so create the file footer.tsx in the components folder. Then we can include the component anywhere in our app using the import statement. We make our terms.tsx page linkable here so the user can tap or click on it.
// footer.tsx
import { View, StyleSheet, Text } from "react-native";
import { Link } from 'expo-router';
export default function Footer() {
return (
<View style={styles.footer}>
<Text style={styles.text}>Developed by Runastartup.com
<Link href={"/terms"} style={styles.link}>Terms</Link>
</Text>
</View>
)
}
const styles = StyleSheet.create({
footer: {
display: "flex",
flexDirection: "row",
justifyContent: "center",
position: "fixed",
width: "100%",
bottom: 0,
backgroundColor: "aqua",
padding: 6,
},
text: {
color: "#515151",
fontSize: 11,
},
link: {
textDecorationLine: "underline",
}
})We use the same tags as before View, Text, Stylesheet in addition to Link. Notice the inclusion of CSS position property along with flex from Flexbox’s properties. This ensures our footer is centered, fixed on the bottom, and doesn’t break positioning of other components. Insert the components in index.tsx between <ScrollView> and <SafeAreaView>.
// index.tsx
import Footer from '@/components/footer'

<SafeAreaView style={styles.container}>
  <ScrollView>
  ...
  </ScrollView>
  <Footer />
</SafeAreaView>
Since we introduced <Link> we can also make a menu with additional linkable pages so under components create menu.tsx with button-like styling:
// menu.tsx
import { View, StyleSheet } from 'react-native';
import { Link } from 'expo-router';

export default function Menu() {

  return (
    <View style={styles.navContainer}>
      <Link href="/" style={styles.button} push>
        HOME
      </Link>
      <Link href="/about" style={styles.button}>
        ABOUT
      </Link>
      <Link href="/form" style={styles.button}>
        FORM
      </Link>
      <Link href="/contact" style={styles.button}>
        CONTACT
      </Link>
    </View>
  );
}

const styles = StyleSheet.create({
  navContainer: {
    flexDirection: "row",
    alignItems: "center",
    justifyContent: "space-around",
    alignSelf: "stretch",
    padding: 10,
  },
  button: {
    fontSize: 12,
    fontFamily: "SpaceMono",
    textDecorationLine: 'none',
    color: '#00cbff',
    backgroundColor: "#ffeebc",
    paddingHorizontal: 8,
    paddingVertical: 4,
    marginHorizontal: 4,
    borderRadius: 10,
  },
});
We styled the menu to be at the top and using flexbox’s space-around even positioning, but we still need to add the pages to _layout.tsx and import them.
// _layout.tsx
import { useFonts } from 'expo-font';
import React, { useEffect } from 'react';
import { SplashScreen, Stack } from 'expo-router';

export default function RootLayout() {

  return (
    <Stack>
      <Stack.Screen name="index" options={{ title: 'Home', headerShown: false }} />
      <Stack.Screen name="about" options={{ title: 'About', headerShown: false }} />
      <Stack.Screen name="form" options={{ title: 'App', headerShown: false }} />
      <Stack.Screen name="contact" options={{ title: 'Contact', headerShown: false }} />
      <Stack.Screen name="terms" options={{ title: 'Policy & Terms', headerShown: true }} />
    </Stack>
  );
}
Now import the menu into index.tsx and while the pages are still missing, you should still be able to see the menu.
// index.tsx
import Menu from '@/components/menu'

  <SafeAreaView style={styles.container}>
   <Menu />
   <ScrollView>
        <Logo />
        <Text style={styles.bodyContainer}>
          <Text style={styles.bodyTitle}>
            How It Works
          </Text>
          <Text>
            {'\n\n'}Lorem ipsum dolor sit amet consectetur adipiscing elit. Quisque faucibus ex sapien vitae pellentesque sem placerat. In id cursus mi pretium tellus duis convallis. Tempus leo eu aenean sed diam urna tempor. Pulvinar vivamus fringilla lacus nec metus bibendum egestas. Iaculis massa nisl malesuada lacinia integer nunc posuere. Ut hendrerit semper vel class aptent taciti sociosqu. Ad litora torquent per conubia nostra inceptos himenaeos.
            {'\n\n'}Pulvinar vivamus fringilla lacus nec metus bibendum egestas. Iaculis massa nisl malesuada lacinia integer nunc posuere. Ut hendrerit semper vel class aptent taciti sociosqu. Ad litora torquent per conubia nostra inceptos himenaeos.
            {'\n'}
          </Text>
          <Text>{'\n\u2022'} Bullet-style List Item 1</Text>
          <Text>{'\n\u2022'} Bullet-style List Item 2</Text>
          <Text>{'\n\u2022'} Bullet-style List Item 3</Text>
        </Text>
      </ScrollView>
      <Footer />
    </SafeAreaView>
Additional Pages with a Contact Form
We finished step04, let’s do step05.
git checkout step05
So our menu doesn’t stay broken, we need to add the additional pages ABOUT, FORM, CONTACT.
About will be static content i.e. just text information, Form will contain a radio input group and a form submission going to a python backend. Contact will be an email contact form also going to a python backend. Since this article focuses on React Native, we won’t explain the details of the python code but it will be included in the github code repository. You can also the backend with your own API (advanced devs).
Create the following files in the app folder and we will fill them out with code:about.tsx
form.tsx
contact.jsx
Here’s the details of the about page, so copy and paste it because there’s nothing new about it relative to the previous components of this tutorial:
import Footer from '@/components/footer';
import Logo from '@/components/logo';
import Menu from '@/components/menu';
import React from 'react';
import { SafeAreaView, ScrollView, StyleSheet, Text } from 'react-native';

export default function About() {
  return (
    <SafeAreaView style={styles.container}>
      <Menu />
      <ScrollView>
        <Logo />
        <Text style={styles.bodyContainer}>
          <Text style={styles.bodyTitle}>
            About{'\n'}{'\n'}
          </Text>
          Lorem ipsum dolor sit amet, consectetur adipiscing elit, sed do eiusmod tempor incididunt ut labore et dolore magna aliqua. Proin tortor purus platea sit eu id nisi litora libero. Neque vulputate consequat ac amet augue blandit maximus aliquet congue. Pharetra vestibulum posuere ornare faucibus fusce dictumst orci aenean eu facilisis ut volutpat commodo senectus purus himenaeos fames primis convallis nisi.
          {'\n'}{'\n'}Phasellus fermentum malesuada phasellus netus dictum aenean placerat egestas amet. Ornare taciti semper dolor tristique morbi. Sem leo tincidunt aliquet semper eu lectus scelerisque quis. Sagittis vivamus mollis nisi mollis enim fermentum laoreet.
          {'\n'}{'\n'}Curabitur semper venenatis lectus viverra ex dictumst nulla maximus. Primis iaculis elementum conubia feugiat venenatis dolor augue ac blandit nullam ac phasellus turpis feugiat mollis. Duis lectus porta mattis imperdiet vivamus augue litora lectus arcu. Justo torquent pharetra volutpat ad blandit bibendum accumsan nec elit cras luctus primis ipsum gravida class congue.
          {'\n'}Let us know what you think!
        </Text>
      </ScrollView>
      <Footer />
    </SafeAreaView>
  );
}

const styles = StyleSheet.create({
  container: {
    flex: 1,
    justifyContent: 'center',
    alignItems: 'center',
    backgroundColor: "#FFF",
    marginBottom: 26,
  },
  bodyContainer: {
    marginHorizontal: 14,
    padding: 14,
    lineHeight: 20,
    fontSize: 12,
    color: '#000',
    borderWidth: 3,
    borderRadius: 10,
    borderStyle: "solid",
    borderColor: '#ffeebc',
    fontFamily: "SpaceMono",
    textAlign: "center",
  },
  bodyTitle: {
    fontSize: 24,
    fontWeight: "bold",
    color: '#00cbff',
  },
});
Here’s the Contact page code followed by the contact page component. We do have a new addition and that’s the <KeyboardAvoidView> component. This component temporarily adds padding to the input content when dealing with input fields since the user’s device will open the keyboard window. Without the component, it’s very likely the user won’t see what they typed on the keyboard.
// contact.tsx
import Footer from '@/components/footer'
import Logo from '@/components/logo'
import Menu from '@/components/menu'
import React from 'react'
import {
    KeyboardAvoidingView,
    SafeAreaView,
    ScrollView,
    StyleSheet,
    Text
} from 'react-native'

export default function Contact() {

  return (
    <SafeAreaView style={styles.container}>
      <Menu />
      <ScrollView>
        <Logo />
        <KeyboardAvoidingView style={styles.formContainer}>
          <Text style={styles.formTitle}>
            Contact
          </Text>
        <EmailContactForm />
        </KeyboardAvoidingView>
      </ScrollView>
      <Footer />
    </SafeAreaView>
  );
}

const styles = StyleSheet.create({
  container: {
    flex: 1,
    justifyContent: 'center',
    backgroundColor: "#FFF",
    marginBottom: 20,
  },
  formContainer: {
    marginHorizontal: 15,
    marginBottom: 30,
    padding: 12,
    fontSize: 12,
    color: '#000',
    borderWidth: 3,
    borderRadius: 10,
    borderStyle: "solid",
    borderColor: '#ffeebc',
  },
  formTitle: {
    fontSize: 24,
    fontWeight: "bold",
    color: '#00cbff',
    textAlign: 'center',
    fontFamily: "SpaceMono",
  },
});
Now create a new file emailContactForm.tsx and place it under the components folder which will be the code to send emails with a backend. This is a long one. Thankfully, the React code and useState hook is identical to what you would use to ReactJS. A new component is added here <TouchableOpacity> which is helpful for user experience on button presses. It modifies the button opacity upon user touch and the default opacity amount is 0.2.
We also include error validation on the front-end, a status loader and error messaging which are essential for proper user experience. Backend validation is also necessary. Attention: the backend endpoint for receiving the form is not included. You will have to create your own.
// emailContactForm.jsx
import React, { useState } from 'react';
import {
  View,
  Text,
  TextInput,
  TouchableOpacity,
  StyleSheet,
  ScrollView,
  ActivityIndicator,
  Alert
} from 'react-native';

export default ContactForm = () => {
  const [name, setName] = useState('');
  const [email, setEmail] = useState('');
  const [message, setMessage] = useState('');
  const [alertMessage, setAlertMessage] = useState('');
  const [isLoading, setIsLoading] = useState(false);
  const [errors, setErrors] = useState({});

  const NETWORK_ERR_MSG = 'Network error. Please check your connection and try again.';
  const SUBMIT_ERR_MSG = 'Error submitting form:';

  const POST_URL = '/your-own-api-endpoint'

  const validate = () => {
    const newErrors = {};

    if (!name.trim()) newErrors.name = 'Name is required';

    if (!email.trim()) {
      newErrors.email = 'Email is required';
    } else if (!/\S+@\S+\.\S+/.test(email)) {
      newErrors.email = 'Email is invalid';
    }

    if (!message.trim()) newErrors.message = 'Message is required';
    setErrors(newErrors);
    return Object.keys(newErrors).length === 0;
  };

  const handleSubmit = async () => {
    setAlertMessage('');
    if (!validate()) return;
    setIsLoading(true);

    try {
      const response = await fetch(POST_URL, {
        method: 'POST',
        headers: {
          'Content-Type': 'application/json',
        },
        body: JSON.stringify({
          name,
          email,
          message,
        }),
      });

      const data = await response.json();

      if (response.ok) {
        Alert.alert('Success', data.message);
        // setAlertMessage(SENT_MSG)
        setAlertMessage(data.message)
        // Reset form
        setName('');
        setEmail('');
        setMessage('');
        setErrors({});
      } else {
        Alert.alert('Error', data.message || 'Something went wrong. Please try again.');
      }
    } catch (error) {
      Alert.alert('Error', NETWORK_ERR_MSG);
      console.error(SUBMIT_ERR_MSG, error);
    } finally {
      setIsLoading(false);
    }
  };

  return (
    <ScrollView contentContainerStyle={styles.container}>
      <View style={styles.inputContainer}>
        {alertMessage !== '' && <Text style={styles.alertText}>{alertMessage}</Text>}
        <Text style={styles.label}>Name</Text>
        <TextInput
          style={[styles.input, errors.name && styles.inputError]}
          value={name}
          onChangeText={setName}
          placeholder="Your name"
        />
        {errors.name && <Text style={styles.errorText}>{errors.name}</Text>}
      </View>

      <View style={styles.inputContainer}>
        <Text style={styles.label}>Email</Text>
        <TextInput
          style={[styles.input, errors.email && styles.inputError]}
          value={email}
          onChangeText={setEmail}
          placeholder="Your email"
          keyboardType="email-address"
          autoCapitalize="none"
        />
        {errors.email && <Text style={styles.errorText}>{errors.email}</Text>}
      </View>

      <View style={styles.inputContainer}>
        <Text style={styles.label}>Message</Text>
        <TextInput
          style={[styles.textArea, errors.message && styles.inputError]}
          value={message}
          onChangeText={setMessage}
          placeholder="Your message"
          multiline
          numberOfLines={4}
          textAlignVertical="top"
        />
        {errors.message && <Text style={styles.errorText}>{errors.message}</Text>}
      </View>

      <TouchableOpacity
        style={styles.button}
        onPress={handleSubmit}
        disabled={isLoading}
      >
        {isLoading ? (
          <ActivityIndicator color="#fff" />
        ) : (
          <Text style={styles.buttonText}>Submit</Text>
        )}
      </TouchableOpacity>
    </ScrollView>
  );
};

const styles = StyleSheet.create({
  container: {
    padding: 20,
    backgroundColor: '#ffffff',
  },
  inputContainer: {
    marginBottom: 15,
  },
  label: {
    fontSize: 16,
    marginBottom: 5,
    fontWeight: '500',
  },
  input: {
    borderWidth: 1,
    borderColor: '#ddd',
    borderRadius: 8,
    padding: 12,
    fontSize: 16,
    width: '100%',
  },
  textArea: {
    borderWidth: 1,
    borderColor: '#ddd',
    borderRadius: 8,
    padding: 12,
    fontSize: 16,
    minHeight: 100,
    width: '100%',
  },
  inputError: {
    borderColor: 'red',
  },
  alertText: {
    fontSize: 16,
    color: '#00d311',
    fontStyle: 'italic',
    marginBottom: 15,
    marginTop: 0,
    textAlign: 'center'
  },
  errorText: {
    color: 'red',
    fontSize: 12,
    marginTop: 5,
  },
  button: {
    backgroundColor: 'aqua',
    borderRadius: 8,
    padding: 15,
    alignItems: 'center',
    marginTop: 10,
  },
  buttonText: {
    color: 'white',
    fontSize: 16,
    fontWeight: 'bold',
  },
});
We finished step05, let’s do step06. Let’s take a break from the longer part of the code and show how you can include custom fonts and splash screens.
git checkout step06
Embedding Custom Fonts & App Icon
You may have noted that the previous code already includes a custom font “SpaceMono” in the styling but we didn’t it’s still not loaded in the app. For the font to be used app-wide, we will add useFonts from expo-font. This is another one-of-many installable pieces used in the expo ecosystem. The font file is already included in the repo under react-expo-tutorial/my-react-native/assets/fonts
In _layout.tsx import useFonts from expo-font and add the line below export default:
// _layout.tsx
import { useFonts } from 'expo-font';
import React, { useEffect } from 'react';
import { Stack } from 'expo-router';

export default function RootLayout() {
  useFonts({
    'SpaceMono': require('@/assets/fonts/SpaceMono-Regular.ttf'),
  });

return (
    <Stack>
     ...
    </Stack>
  );
To render this custom font, we have to specify it in the StyleSheet for each component. You should apply it to any <Text> tag because container tags will ignore it. The font is inherited for any child <Text> tag. I’ve applied it to all components which have the style <Text style={styles.bodyContainer}> and the menu.tsx button.
// index.tsx, about.tsx, form.tsx
const styles = StyleSheet.create({
  bodyContainer: {
    marginHorizontal: 18,
    padding: 18,
    borderWidth: 3,
    borderRadius: 10,
    backgroundColor: '#FFF',
    borderStyle: "solid",
    borderColor: '#ffeebc',
    lineHeight: 20,
    fontSize: 14,
    fontFamily: "SpaceMono",
    textAlign: 'center',
  },
});

// menu.tsx
const styles = StyleSheet.create({
  button: {
    fontFamily: "SpaceMono",
    fontSize: 12,
    textDecorationLine: 'none',
    color: '#00cbff',
    backgroundColor: "#ffeebc",
    paddingHorizontal: 8,
    paddingVertical: 4,
    marginHorizontal: 4,
    borderRadius: 10,
  },
});
Reload the app in your browser or device and you should see the new font.
For the icon, there are two steps. Add the image as a png graphic to your assets folder and modify the app.json file. Image dimensions of 1024 x 1024 pixels are recommended.
// app.json
{
  "expo": {
    "name": "my-react-native",
    "slug": "my-react-native",
    "version": "1.0.0",
    "orientation": "portrait",
    "icon": "./assets/images/icon.png",
    "scheme": "myreactnative",
    "userInterfaceStyle": "automatic",
    "newArchEnabled": true,
    "ios": {
      "supportsTablet": true
    },
    "android": {
      "adaptiveIcon": {
        "foregroundImage": "./assets/images/adaptive-icon.png",
        "backgroundColor": "#ffffff"
      },
      "edgeToEdgeEnabled": true
    },
    "web": {
      "bundler": "metro",
      "output": "static",
      "favicon": "./assets/images/favicon.png"
    },
    "plugins": [
      "expo-router",
      [
        "expo-splash-screen",
        {
          "image": "./assets/images/splash-icon.png",
          "imageWidth": 200,
          "resizeMode": "contain",
          "backgroundColor": "#ffffff"
        }
      ]
    ],
    "experiments": {
      "typedRoutes": true
    }
  }
}
Build and Deploy cli
Finally, we have reached the greatest benefit of React Expo which is the command-line tool for building and deploying. We’re going to summarize the official documentation which I recommend.
You’re learned the start command for development npx expo start and now we can use the additional commands. For this process, it’s recommended to sign-up on the website. There’s a free plan which allows 30 builds per month. https://expo.dev/signup
The EAS CLI doesn’t come installed by default or it may have a newer version when you try so install it with the command:
npm install -g eas-cli

// list of commands available from EAS:
EAS command line tool
VERSION
eas-cli/16.6.1 darwin-arm64 node-v24.6.0
USAGE
$ eas [COMMAND]
TOPICS
account manage account
branch manage update branches
build build app binaries
channel manage update channels
credentials manage credentials
deploy deploy your Expo Router web build and API Routes
device manage Apple devices for Internal Distribution
env manage project and account environment variables
fingerprint compare fingerprints of the current project, builds, and updates
metadata manage store configuration
project manage project
update manage individual updates
webhook manage webhooks
workflow manage workflows
COMMANDS
analytics display or change analytics settings
autocomplete display autocomplete installation instructions
build start a build
config display project configuration (app.json + eas.json)
credentials manage credentials
deploy deploy your Expo Router web build and API Routes
diagnostics display environment info
help Display help for eas.
init create or link an EAS project
login log in with your Expo account
logout log out
onboarding continue onboarding process started on the https://expo.new website.
open open the project page in a web browser
submit submit app binary to App Store and/or Play Store
update publish an update group
whoami show the username you are logged in asYou can choose to build the software package for Android and iOS. There’s a step through process the first time you build it when you run:
eas build:configure
EAS project not configured.
? Would you like to automatically create an EAS project for @rtgbro/my-react-native? › (Y/n)

✔ Created @rtgbro/my-react-native: https://expo.dev/accounts/[username]/projects/my-react-native on EAS
✔ Linked local project to EAS project cdeg23-k235-31f9-8d10-f153212a4361
💡 The following process will configure your iOS and/or Android project to be compatible with EAS Build. These changes only apply to your local project files and you can safely revert them at any time.

? Which platforms would you like to configure for EAS Build? › - Use arrow-keys. Return to submit.
❯   All
    iOS
    Android
This will generate a new file called eas.json and update your app.json file with the projectId.
We choose Android for this tutorial. Run the command again but without “configure”. You’ll be asked to create package name, credentials and Android Keystore file. The defaults are “Yes”. This will take a few minutes.
eas build
✔ Select platform › Android
Resolved "production" environment for the build. Learn more: https://docs.expo.dev/eas/environment-variables/#setting-the-environment-for-your-builds
No environment variables with visibility "Plain text" and "Sensitive" found for the "production" environment on EAS.

📝  Android application id Learn more: https://expo.fyi/android-package
✔ What would you like your Android application id to be? … com.[username].myreactnative
No remote versions are configured for this project, versionCode will be initialized based on the value from the local project.
✔ Incremented versionCode from 1 to 2.
✔ Using remote Android credentials (Expo server)
✔ Generate a new Android Keystore? … yes
Detected that you do not have keytool installed locally.
✔ Generating keystore in the cloud...
✔ Created keystore

Compressing project files and uploading to EAS Build. Learn more: https://expo.fyi/eas-build-archive
✔ Uploaded to EAS 1s
✔ Computed project fingerprint

See logs: https://expo.dev/accounts/[username]/projects/my-react-native/builds/[hash-string]

✔ Build finished

🤖 Android app:
https://expo.dev/artifacts/eas/3kj4h5lk3j4l6jh34l.aab
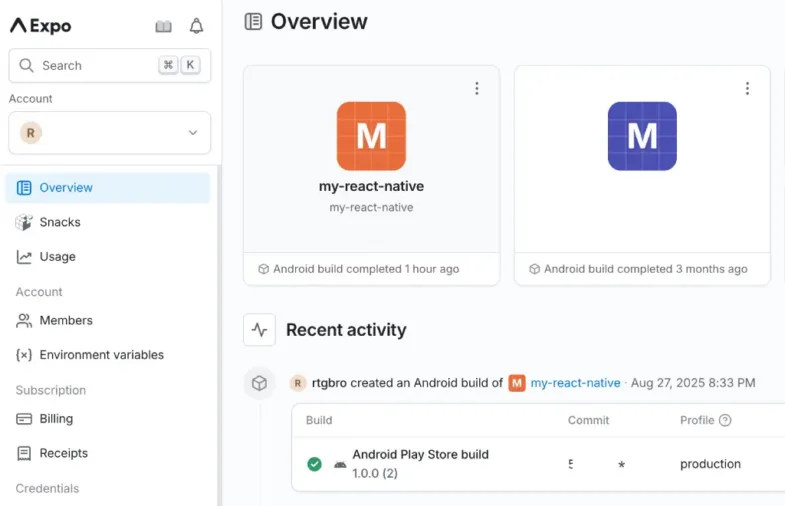
From the expo.dev website, your app’s aab file becomes available for download and deployment to the Play store. Alternatively, you can execute a “preview” build for sharing and testing using the –profile parameter:
eas build --platform android --profile preview
THE END
Tutorial github repo: https://github.com/rutkat/react-expo-tutorial/
I also wrote a quick start guide to building a React Native app wrapper to a website https://runastartup.com/react-native-expo-quickstart-guide/
References:
https://ionic.io/resources/articles/ionic-react-vs-react-native
https://docs.expo.dev/build/setup
https://hackernoon.com/react-native-vs-native-app-development-making-the-right-choice
Leave a Reply
You must be logged in to post a comment.