How to increase system font size in Mac OS
Upgrading your Mac OS can be a pain with many frustrations, quite the opposite of what an upgrade should do. While several internet articles describe issues with text clarity aka “blurry” (https://osxdaily.com/2018/09/26/fix-blurry-thin-fonts-text-macos-mojave/, https://https://www.geekdashboard.com/fix-blurry-text-font-issue-mojave/), my issue was with text size as the default settings seems smaller than Sierra, which I had previously running on my Mac.
So here’s how you can increase the system font size on your Mac OS. I have installed version Ventura so hopefully all the steps will be the same for you. It’s actually just two steps because there’s a location to change your dashboard’s font size and another location to change your filename text.
To change the icon text on your mac’s dashboard, ensure your focus is on Finder then navigate to the View menu. You should see Show View Options so select that. Alternatively, the keyboard shortcut is CMD+J. Screenshot below:
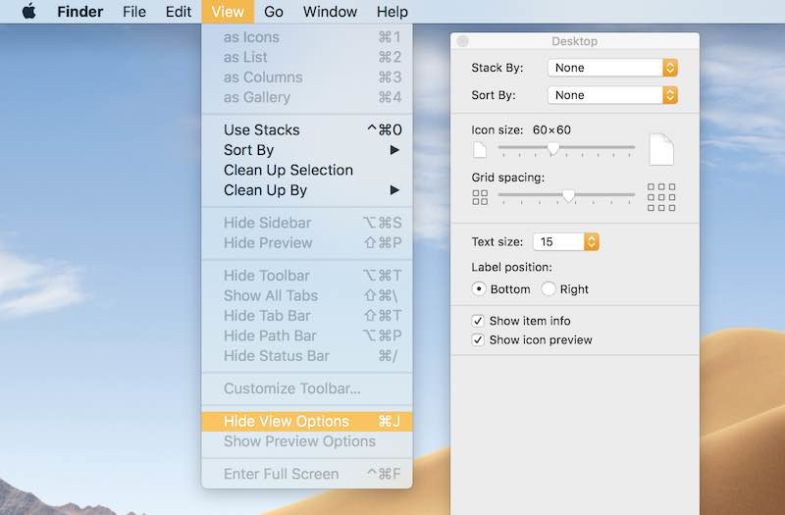
While changing the settings in view options you should notice them instantly on your dashboard.
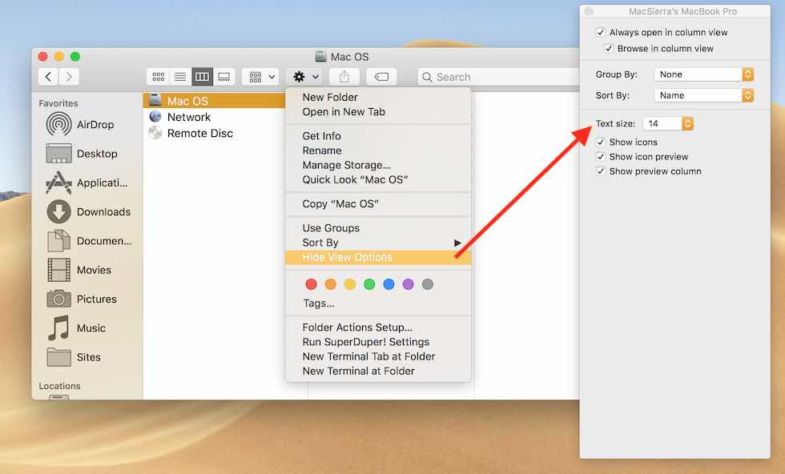
Now onto the filename text sizes. Open a Finder window from the Finder top menu bar or selecting an existing Finder window. Look for the gear icon in the toolbar. If you don’t currently see it, you may have to enable it first by right-clicking in the window’s toolbar area and selecting Customize Toolbar.
Once you click see the gear icon, click on it to see a context-menu, then select Show View Options. You should see a pop-up window with settings to change how text appears in your Finder windows. Apply the changes and you’re done. The choices also allow for grouping and sorting files. Since these settings are not obvious to find, it would be better for Apple to group them together in the Finder menu bar which is quickest to access. Take note Apple, even Windows makes it easier to change system font size.